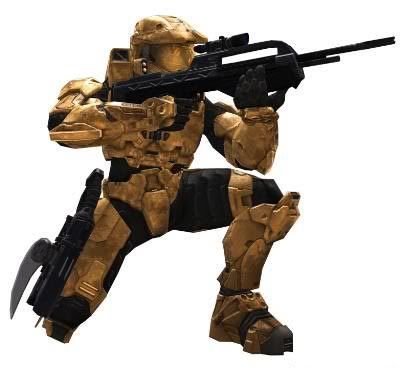
The battle rifle is the most versatile gun in the game and you need to master it if you ever want to get any good. It is a mid-long range weapon. It fires in controlled bursts of 3 and is capable of taking out an enemy in 4 shots at mid range. It can be used in just about any situation, and will beat assault rifle every time except in very close range.
You should avoid trying to melee with the battle rifle because it is not as effective as with most other guns, including the assault rifle. It is incredibly effective vs. snipers- 1 headshot will unscope them and then you can continue pumping them full of shots until they are forced to take cover.
You must lead your shots to be a good shooter with the battle rifle. If you shoot like a centimeter from where there head is now in the direction they are moving and you will sink many more shots then shooting straight for their head.
It is very important to note that until the opponents shields have been taken down, A BODY SHOT WILL DO JUST AS MUCH DAMAGE AS A HEAD SHOT. 3 body shots and 1 head shot is just as effective as 4 head shots, although much easier to land. An excellent strategy is to aim for their chest, because your reticule will naturally move up ever so slightly as you are shooting and by the 4th - 5th shot you will be at their head level.
Strafing is absolutely essential in all usage of the BR, especially in BR vs BR. Please refer to my other article on strafing. A point of strafing I would like to bring attention to again is the crouch. It is extremely effective in BR vs. BR battles at mid range because the vast majority of your opponents will aim straight for your head and by crouching you can make them miss a shot entirely. By jumping when you are just about to die you can force them to get 4 body shots which will not kill you rather than 3 body shots and 1 head shot. It does not matter the order either because until your shields are down it does the same damage - so if he hit you with 3 perfect head shots, you jump and he gets a body shot, he still WILL NOT kill you.
To scope or not with the battle rifle? In mid range battles it is absolutely unnecessary and with practice you should be able to shoot better unscoped than scoped. In long range battles, it is your own personal preference. I personally like to scope in for the accuracy bonus, but it comes with the cost of wasting time getting unscoped and then rescoping, ect.
When facing an opponent using a weapon like assault rifle, smg, spiker ect. always move backwards while you are shooting to keep a mid range scenario. If you let them get close enough to you they will have the advantage. I guarantee you if you keep a mid-range while pumping shots into them you will win every time with the battle rifle.
The battle rifle is also extremely effective for detonating explosive material - I can't tell you how many kills I've scored by shooting the fusion coils on The Pit from your opponent coming out of the green hallway where the active camo spawns. Or when they are coming down the hallway from where rockets spawns. This strategy also works great on construct too.
The battle rifle is available on almost every map and if you do not start with one you should make it one of your main concerns to obtain one as quickly as possible. Practice with it constantly and stop using guns like the assault rifle primarily. This is the first and most important move to stepping up your game.
A well tossed frag grenade to take down the shields and 1 clean headshot is a combination that has done me wonders - check out my article on grenade tips for further reference.
A youtube video for you to watch on battle rifles can be found here: http://www.youtube.com/watch?v=MtZbPg36L2w
Battle Rifle Tips
Strafing

Strafing is an absolutely essential skill in combat and can be the difference between you winning or losing the fight.
What is strafing?
Strafing is any movement to avoid shots. You probably already utilize a basic strafe without knowing it, however I am going to help you improve your technique.
The golden rule of strafing is to ALWAYS MIX UP YOUR MOVEMENTS. If your doing the exact same strafe every time you enter a combat your opponent is going to know exactly where your going to be at next and you might as well just stand still.
How do I strafe?
There are many different movement patterns and tricks you can add into a strafe.
Left/Right movements: This is a very simple strafe, it involves taking a few steps to the left and then a few to the right, ect. It is one of the most common that I see and it is great for beginners. However, after you make one short right movement and one short left movement, avoid doing the exact same thing again. Think of this: Your opponent will now be expecting your next move to be to the right and if you surprise him by continuing left you will have a second or two advantage which is crucial.
Circling: This is by far the worst tactic you can use in a strafe. This is when in a fight you move in a circular motion around each other just firing at each other. It is pointless and retarded and you might as well just stand still because it is so easy for the enemy to lead his shots a little in your circle pattern and get a 4-shot kill.
Moving forward/Moving back: This is only effective in mid-long range fights and should not be utilized in short range fights. 90% of players aim right for the head with the battle rifle so this can easily cause them to miss shots and combined with the left/right movement strafe it is very deadly.
Jumping: Too often I see people just leaping around in a BR fight and that is not effective at ALL. Jumping, however is one of the most crucial elements in the strafe. When do you jump? When you are nearly dead. Right before you are blinking red. This is extremely useful for several reasons: It will cause your opponent to land a body shot rather than a head shot which will NOT kill you. The reason you should only do this while you're almost dead is until your bar is blinking red, a shot to the head and a shot to the body with the BR will do the exact same amount of damage. Dont believe me? Try it out for yourself. Thats why there is the famous 3 body 1 head shot combo. The higher up you are the easier it is to score headshots. Want to test this out for yourself? Try throwing down a grav lift before engaging in combat and then start shooting at your opponent from the sky and on your way down. You will have a 1-3 shot advantage on your opponent I can guarantee you.
Crouching: Crouching works on the principal that just about everyone aims for the head when engaged in a BR fight. If they are shooting for your head and you crouch down, you can cause them to miss 1 shot completely, and then if you have really good timing you can pop back up at just the right time and force a body shot, which the average opponent will then take the split second to re-align their reticule to your head. Try it out, its a great fight stopper. Only problem is if you are crouched and they throw a nade' , you can say goodnight.
For a video from MLG Pro NEXY on strafing please check out http://www.youtube.com/watch?v=qOXXreOXlVI
Remember to take all these techniques, and mix them up a bit and see what works for you.
Always being unpredictable is the key to a good strafe.